Performing a Bench Trial
08/12/5
What, Why & When
A bench trial is a small-scale trial meant to simulate the addition of an additive or fining agent to a larger volume of wine.
The idea is that by trying an addition or fining out on a small scale, you can try a range of dosages, or even different products, without having to treat all of your wine. This allows you to accurately determine the exact process and dosage that will have the optimal impact on your wine, allowing you to move forward and perform this process on your whole batch.
Ideally, we'd be doing a bench trial ahead of the addition of any product that has a dosage range rather than a fixed dosage that is appropriate. Indeed, this is most additions in winemaking. For example, most of us have seen how fining agents like bentonite come with a range of potential dosages on the package rather than a predetermined “correct” dosage level.
You may have also read about how there is a danger of stripping away much of a wine's character when performing a fining, including bentonite. Wouldn‟t it be nice to know exactly how much bentonite will take care of your hazy wine so that you don‟t have to risk stripping out more flavor, aroma and color than necessary? Enter the bench trial.
Bench trials should be performed immediately ahead of a fining or addition procedure. Your wine is always changing. If you wait too long after a trial to make the actual addition or fining, the effect may be different from what you experienced in the trial itself. This means that you might schedule a bench trial for egg white fining a week ahead of the actual fining, but plan on doing a TA addition trial just 2-3 days ahead of when you plan on making the addition to the whole batch of wine.
How To
The bench trial process can be broken down into 6 basic steps: 1) Determining your sample volume, 2) Determining your range of dosages for the trial, 3) Scaling the dosages down to your sample size, 4) Creating a model solution, 5) Dosing the samples and 6) Evaluating the results. Let's go through these step by step.
-
Determine your sample volume. There is no perfectly correct sample volume for a trial. The correct volume depends on how much wine you have to work with, how small the dosages of the product you‟re trying are and how exact you can be with a pipet and scale. So, select a larger sample size if you have plenty of wine to work with, if the additive or fining agent needs a very small dosage or if you feel that you may not be too accurate with measuring out the test dosages. Remember that the smaller the sample and/or dosage are, the more significant any small error on your part becomes. If you are trying to measure out 10 mL of liquid and are off by 1 mL, that is a 10% error – pretty significant. However, if you are measuring out 100mL of liquid and are off by 1 mL, a 1% error is not such a concern. We recommend sample sizes anywhere from 50 mL up through 500 mL.
-
Determine your range of dosages. Most additives and fining agents have a recommended range of dosages for treating wines. For instance, MoreWine!'s unique, pre-soaked bentonite product Albumex can be added in a range between 1 and 3 g/L of wine. Your first step is deciding how many samples you are going to run. We typically run 4 or 5 samples. Remember to always keep one untreated sample off to the side as a control. Also, it is a good idea to try to keep the step between the dosages uniform. If we were running a trial with Albumex, 5 samples and a control would be a good idea. The dosages for the samples would be 1 g/L, 1.5 g/L, 2 g/L, 2.5 g/L and 3 g/L. You may have noticed that we are working with the metric system here. While it may take some getting used to, it's the best and easiest way to do this. If you're having trouble wrapping your head around it, try keeping the conversions page at the end of this manual handy while you're working out your dosages.
-
Scale down the dosages to your sample size: As we mentioned in the previous step, the dosages that you choose will likely be in terms of grams/liter, or perhaps in oz / gallon, though metric units are recommended. No matter what units you use, it is unlikely that you'll be running the trial on samples as big as 1 liter (or 1 gallon). You'll need to do a little math to scale down the dosage to match your sample size. The basic idea here is that you ask yourself the following question: “If I want to achieve a dosage of 1 g/L, how much product do I weigh out for my 50mL sample?” Since 50mL is 5% of 1L, you also need 5% of 1g, which is 0.05g. The easiest way to set up the math is as follows: (Dosage)x(Conversion Factor)x(Sample Size)=(Amt of Product for Sample). For example; (1g/L)x(1L/1000mL)x(50mL) = 0.05g. Notice how both the terms for L and mL cancel out leaving only g in the end. If you ever wind up with a unit related to volume at the end of the equation then you know that you've made a mistake somewhere and need to go back to the start.
-
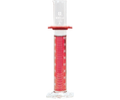
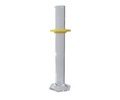
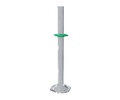
Create a model solution: Most of us don't have a scale that can weigh down to 0.05g accurately. Even a scale that claims to have a resolution of 0.1g will not weigh out accurately until you have at least 0.5g on the scale, unless you are using a very advanced laboratory scale that costs thousands of dollars. How do we get the small amount of product that we need for the trial? The answer is to create a solution of the product you are trying and add a measured amount of it to each sample. This is also very straightforward. The first step is to take a look at the range of dosages: is the increment between each dose more or less than 50% of the first dosage? In our Albumex example it is exactly 50%: the first dose is 1g/L and the dose rises by 0.5g at each step. When the increment between doses is 50% or more of the original dose, you want to set up the solution so that 1mL of the solution is equivalent to the smallest dosage itself. For Albumex this means that you‟d create a solution where 1mL of the solution would add 0.05g of Albumex to your 50mL sample (equivalent to 1 g/L addition). To make the second sample, where you need 0.075g of Albumex (50% increase over the first dose, 1.5 g/L), you then just add 1.5mL of your model solution. In order to create the model solution you must first determine how much of the product you are testing you wish to have contained in 1mL of the model solution. In our case the answer is 0.05g. Weigh out 1g of your product and dissolve it in 10mL of water. Note that a graduated cylinder is the best tool for this. Now you have a model solution where each mL contains 0.1g of Albumex: (1g/10mL)x(1mL)=0.1g. To reach your desired 0.05g/mL then simply cut this solution with another 10mL of water, cutting the amount of Ambumex in each mL in half to 0.05g. Now, If your interval between doses is less than 50% of the initial dose (dosages of 0.5g/L, 0.6g/L, 0.7g/L, etc, for example) then it is best to make a solution where each mL will contain enough to make up the interval rather than enough to make the initial dosage.
-
Dose your samples: Now that you have made up your model solution it is time to add the doses to the samples. This is probably the easiest part of doing the bench trial. Simply add enough mLs of the model solution to each sample in order to achieve the dosage rate that you are looking for. In our example with Albumex, this would mean adding 1mL to the first sample, 1.5mL to the second, then 2mL, 2.5 and finally 3mL to the last sample. The easiest way to do this is with a pipette. However, you must take care not to add too much model solution or you will have to discard the sample and start over. A good technique for this is to fill a pipette to a given level, then seal the end with your finger tip. Since you have to push pretty hard to get a good seal, it is possible to allow liquid out of the pipette by simply reducing the pressure you‟re using to keep it sealed. You should not have to actually take your finger off the pipette in order to allow liquid to flow. Try practicing this with water a bit and you‟ll get the hang of it pretty quickly.
-
Taste your samples: Now for the fun bit. After allowing enough time for the product you're testing to work, you want to come back and taste the samples to see which dosage (if any of them) you liked the best. It is a good idea to do this tasting with one or two other people there as well – many palates are better than just one. Here‟s an important note: ideally you would be able to leave your samples for as long as it normally takes the product to work. With many additives, you would want to flush out the sample vial with Argon gas prior to closing them up. If you do not have the equipment necessary to do this, then you really only want to allow the sample to sit for about 24hr or it will begin to oxidize while you‟re waiting for the product to work. It is acceptable to taste the samples after 24hr, but recognize that you will not be getting a fully clear picture of products benefits or negatives. If this is the case for you, it is best if you only add about half of whatever dosage you decide on as best when you treat your whole volume of wine. Allow enough time for this addition to work completely, and then taste the wine again to evaluate whether or not you think a further addition is necessary. We can promise you that in some cases it will not be.
Tips and Tricks
Finally, here are a few generally tips and tricks to keep in mind:
-
We‟ll keep saying it: get comfortable with the metric system. It makes all of the math for scaling up and down much easier, as everything works on the same base 10 system.
-
Invest in a decent scale that measures in grams and has a resolution down to 0.1g. our MT351A is a perfect choice.
-
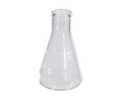
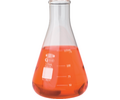
Erlenmeyer flasks are not marked exactly and should not be trusted for exact measurements of volume. They typically have a + 5% error. Measuring your liquid with a pipette is always best. We have pipettes that measure up to 50mL with very high accuracy.
-
A 50mL or 100mL graduated cylinder is pretty much required if you want to do this correctly.
Related Products
All contents copyright 2024 by MoreFlavor Inc. All rights reserved. No part of this document or the related files may be reproduced or transmitted in any form, by any means (electronic, photocopying, recording, or otherwise) without the prior written permission of the publisher.